Video Editing Software
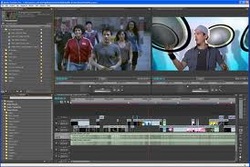
Of course there are a wide variety of video editing software packages out there including Adobe Premiere Pro, Apple Final Cut Pro, Avid and Sony Vegas. I prefer Adobe Premiere Pro because of the way that is handles the files from our DSLR camera without having to transcode them and its seamless integration with the other Adobe applications like Photoshop, After Effects and Encore.
Adobe Premiere Pro Keyboard Shortcuts (pdf) Workshop Handout
Sample Files: You can use these zipped video/audio files (500+MB) to practice your editing skills. Make sure to read the copyright text file.
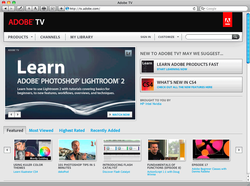
Adobe TV: Learn Premiere Pro CS6 - This is a great series of tutorials.
How to Create a Video Story with Adobe Premiere Pro CC (new step by step lessons with sample files!
Guidelines for the Art of Video Editing: Great article on the art of editing.
Adobe Premiere Pro Keyboard Shortcuts (pdf) Workshop Handout
Sample Files: You can use these zipped video/audio files (500+MB) to practice your editing skills. Make sure to read the copyright text file.
Adobe TV: Learn Premiere Pro CS6 - This is a great series of tutorials.
How to Create a Video Story with Adobe Premiere Pro CC (new step by step lessons with sample files!
Guidelines for the Art of Video Editing: Great article on the art of editing.
Adobe Premiere Pro Basics Activities
Getting Started: (3:59) File management is critical in video editing. This tutorial will show you how to setup a project folder to store all your video clips and Premiere data. Then you will need to copy the files from your memory card into this folder.
Premiere Pro Setup: (4:45) This tutorial will show you how to save Premiere Pro into our project folder, how to import your video clips into the project and then create a sequence (timeline) that perfectly matches your footage resolution/frame rate/audio quality.
>> CS6 Auto Save & Premiere Interface: (5:30) This tutorial will show you how to set the Auto Save to 5 minutes and how to easily adjust the Premiere interface. CS5 and below: Auto Save & Premiere Interface: (3:04) This tutorial will show you how to set the Auto Save to 5 minutes and how to easily adjust the Premiere interface. • Workspace: I love the clean new look that CS6 offers. It allows you to focus on your media. I encourage you to take a little time to customize your workspace and save it. Check you my tutorial on how I like to configure mine and why.
Tip: To navigate bins Ctrl + double click on bins to open in the same window.
The new cinema mode (full screen) is Ctrl + ~ (tilda)
Preferences: Trim - set ripple trim as default
- - - - - - - - - - - - - - - - - - - - - - - - - - - - - - - - - - - - - - - - - - - - - - - - - - - - - - - - - - - - - - - - - - - - - -
>> CS6 Rough Cut: (3:49) This tutorial will show you how to quickly create a rough cut of your project using both the "old school" technique in the source monitor and the new hover scrubbing in the project window. Hover scrubbing ROCKS! CS5 and below: Rough Cut: This tutorial will show you how to quickly create a rough cut of your project.
Tip: JKL and i/o - It is time to learn these powerful keyboard shortcuts.
Alt + drag to copy clips on timeline
>> Story Based Editing Techniques (4:32) This tutorial will show you how to start with an interview or narration track and build a project around it based on the story. Some techniques from CS6.
>> Editing with CS6: (3:00) This tutorial will show you the new editing techniques in CS6. New Right click editing options is very nice! Dynamic Trimming and Editing with the Keyboard (8:40) is a new feature in CS6 and here is a tutorial by Video2Brain that covers these new features.
Tip: Adobe changed the keyboard shortcut from moving between edit points to up/down arrow.
Double click edit point brings up the trim window.
Tutorial>> Titles (6:50) In this tutorial you will learn how to create and edit titles in Premiere’s titling program. Then I will
talk about how to overlay them on top of your video and add transitions. Finally I will show you how to create rolling credits.
Take 5: Good Text-ations (10:52) This is a face paced look at how to create good titles.
Titling Techniques (6:46) This tutorial will show you how to take your titles to the next level with customized fonts, strokes, gradients and backgrounds.
Tutorial>> Transitions (4:28) In this tutorial you will learn how to add transitions in-between your clips. Then I will show you how to edit a transition and apply the default transition with a keyboard shortcut. Once you master this skill, try not to overdo the transition!
>> Export: (1:38) This tutorial will show you how to export your project with the new “Match Sequence” setting and a few other options. This feature was introduced in CS4 but CS6 now has more preset export options for the popular H264 codec.
Advanced Editing Lessons
Green Screen (Ultra Key Effect) >> Tutorial (4:11) Green Screen Tutorial using the Ultra Key Effect
Premiere Pro: Ultra Keying (9:00) This tutorial from Layers Magazine goes in way deeper but contains advertising.
*Additional Reading
Article on lighting for Chroma Key: "24 Phat Tips for Chromakey
lighting" http://www.digitalproducer.com/2003/12_dec/tutorials/12_22/cw_ckeyphat_tips.htmTutorial>> Working with Audio (3:01) In this short tutorial you will learn how to adjust your audio levels using keyframes or
audio transitions. Sound Bible is my favorite free sound clips resource.
Tutorial>> Basic Effects (3:59) In this tutorial I will show you how to adjust the opacity of a clip and add a little movement to
your titles.
>> Warp Stabilizer: (2:19) This tutorial will show you the new warp stabilizer effect that is now in CS6. It is an amazing tool for dealing with any shaking footage you might have from hand holding that DSLR. CS6 Only.
Help Documents: Warp Stabilizer | Rolling Shutter
>> Adjustment Layers: (2:46) They work a little differently in Premiere so check out the tutorial. Basically, they allow you to apply effects to multiple clips and they act as a layer so you can play with the opacity and other attributes of a layer. Very cool!
Merging Separately Recorded Sound with Video Clips (5:30) In this tutorial you will see how to sync up a video clip with a separately recorded sound clip using the clap of the hands.
Ken Burns Effect - In this series of tutorials you will see you to create the pan and zoom effect that documentary filmmaker Ken Burns has made so famous.
Importing stills and setting preferences (2:44)
Animating stills to the sequence (3:58) Tip: Double click in program monitor to bring up selection handles.
Applying the zoom/pan effects and copy/pasting the effect on additional stills (7:48)
Nesting Sequences (8:02)
Time Remapping (5:45) - This tutorial will show you how to dynamically change the speed and direction of your video using Time Remapping. Featuring "Drops of Awesome"
Blend Modes (5:45) - This tutorial will show you how to blend multiple layers of video together using Blend Modes. Featuring "Drops of Awesome" Try download 5 Free Film Burns to use with this effect.
Multi-camera Edit - (11:02) This lesson is from Adobe TV. You can use any clip from a multi-camera shoot but if you want some sample files I will post them on the resources page. Examples
Speed Grade is Adobe's new color grading software. I haven't played with it yet so here is a link to Adobe TV.
"Learning Speed Grade CS6"
>> CS6 Prelude - Ingest (4:39): Adobe introduced a new application in CS6 specifically designed to ingest (download files to your computer). The coolest thing about this application is that you can preview the files prior to copying them and you can import just part of a longer clip!
>> CS6 Prelude - Logging and Sending to Premiere (5:40): Prelude does more than just ingest the footage from your memory based cameras. You can log your footage, create sub clips, and even a rough cut that you can send directly to Premiere Pro.
Color Correction
Here is a series of tutorial on color correction. This is not an area I have much experience but I have seen how effective it can be so I wanted to provide you with some resources from Adobe TV.
Basic Use of the 3-Way Color Corrector (5:29)
Setting up the 3 Wheels of the 3-Way Color Corrector (4:36)
Using the 3-Way Color Corrector as a Secondary Color Corrector (8:57) This lets you affect one part of your image.
Basic Use of the 3-Way Color Corrector (5:29)
Setting up the 3 Wheels of the 3-Way Color Corrector (4:36)
Using the 3-Way Color Corrector as a Secondary Color Corrector (8:57) This lets you affect one part of your image.
Switching to Adobe Premiere Pro CS5
Thinking about making the move to Adobe Premiere Pro? Learn from industry veterans Karl Soulé and Kevin Monahan as they show you how easy it is to make the transition from Final Cut Pro to Adobe Premiere Pro.
Adobe TV Series (8 lessons)
Adobe TV Series (8 lessons)
Additional Adobe Premeire Pro Workshops
Introduction to Adobe Premiere Pro: Learn how to edit video like a pro with Adobe Premiere Pro. This class will give you all the skills you need to start trimming, adding titles, and music to your video. You will leave with a DVD of tutorials and sample files to use in your
classroom.
Beyond the Basics with Adobe Premiere Pro: Learn how to get the most out of Adobe Premiere Pro. You will learn how to use the multi-camera editing function, animated a multi-layered Photoshop sequence. You’ll be introduced to garbage mattes, green screen and other keying tools. This workshop will cover video effects, including controlling your effects with Key Frames, as well as covering some of the new features in CS3 such as “time remapping”.
Digital Video: Foundations of Video Design and Production
Adobe Certified Associate Exam
Shooting and Editing DSLR Video Using Adobe Tools (Adobe TV)
CS5.5 Production Premium / DSLR video editing
http://www.adobe.com/products/creativesuite/production/dslr.html
Photoshop Lessons
Adobe Photoshop for Video Production: Learn how to harness the power of Adobe Photoshop both as a tool to manipulate your video clips and to build art work that you can incorporate into your video projects.
More Photoshop Tutorials
Adobe Photoshop Workshop for CTE Teachers: In this workshop you will use Adobe Photoshop CS4 to create a variety of classroom projects that are part of the Adobe Visual Design Curriculum and will help to prepare your students for the Adobe Certified Associate Exam. These lessons will include sample files, video tutorials and rubrics so they can be used back in your classroom immediately.
After Effects
Adobe After Effects is the industry leader in motion graphics and tightly integrated with the Adobe Suite. This is a great tool for any student filmmaker considering a career as an editor.
How to add effects, motion graphics in After Effects - step by step lessons with sample files.
How to add effects, motion graphics in After Effects - step by step lessons with sample files.
Related Products

Red Giant makes some great plug-ins for Premiere Pro but make sure to looking the academic pricing.
PluralEyes - excellent for syncing video with sound. This is a stand alone application.
Looks 2.0 - Color effects that set the mood for your story
Video Copilot - Along with great video tutorials on how to use After Effects, Video Co-pilot offers some cool products.
PluralEyes - excellent for syncing video with sound. This is a stand alone application.
Looks 2.0 - Color effects that set the mood for your story
Video Copilot - Along with great video tutorials on how to use After Effects, Video Co-pilot offers some cool products.

Joe Dockery | [email protected] | 425-831-8126
Mount Si High School | CTE Digital Media Teacher
Mount Si High School | CTE Digital Media Teacher