Invest in Lenses!
The ability to use a variety of lenses is a huge part of why DSLR video is such a great teaching tool! Basically it comes down to controlling the depth of field or having your subject in sharp focus and everything else out of focus.
Here is what I have learned after just a couple months of working with my students and our new DSLR.
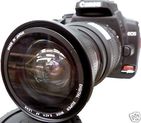
- The 18-55mm kit lens is great for most situations especially when you are in a hurry
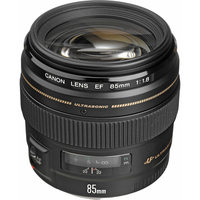
- Our 85mm f1.8 is a great lens for portraits when you have enough room to setup the shot
- Our 30mm f1.4 is a great lens for all those medium shots you need to tell a story (one of my students favorites)
- Our 14mm Wide angle lens is great for those wide shots and when you need everything in focus
- Our next lens will be a macro lens for those extreme close-up where you want to fill the frame with your subject. We are currently looking at the Canon EF 100mm f/2.8
- We are also lusting after a few ND filters so we can shoot outside using a shallow depth of field
What lenses should I use for DSLR filming on a budget? - DSLR Film NOOB
Here is what I have learned after just a couple months of working with my students and our new DSLR.
- The 18-55mm kit lens is great for most situations especially when you are in a hurry
- Our 85mm f1.8 is a great lens for portraits when you have enough room to setup the shot
- Our 30mm f1.4 is a great lens for all those medium shots you need to tell a story (one of my students favorites)
- Our 14mm Wide angle lens is great for those wide shots and when you need everything in focus
- Our next lens will be a macro lens for those extreme close-up where you want to fill the frame with your subject. We are currently looking at the Canon EF 100mm f/2.8
- We are also lusting after a few ND filters so we can shoot outside using a shallow depth of field
What lenses should I use for DSLR filming on a budget? - DSLR Film NOOB
Manual Focus
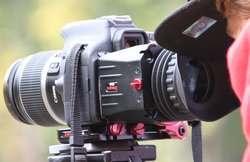
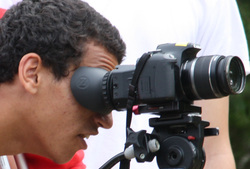
Zacuto Z-Finder in action!
Any professional will tell you that using manual focus is essential. This can be challenging especially when shooting in HD on a DSLR camera. Here are some tips that should help you.
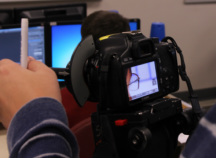
Image Magnification Buttons: Use the navigation buttons to move the little white box onto your subject. Then press the + image magnification button twice to zoom in 10 times. Now when you twist the focus ring you will be able to see the details that will help you to dial in sharp focus. Just press it again and you will return to normal view. Please watch this video demonstration.
Manual Focus Activity Handout: Word | Pdf
External View Finder: My students love to use our Zacuto Z-Finder external view finder to help focus, especially when outdoors.
Peaking: Some external monitors offer a peaking function that highlights areas of the image that are in sharp focus with a colored outline.
*Magic Lantern offers this feature inside the T2i.
Manual Focus and Depth of Field Activity
*This activity will work best if you have your own SD memory card or maybe you can share one with a partner. Don’t forget to set focus manually for every shot! Write down the lens, shutter speed, aperture/f-stop, and ISO for
each shot. We are going to set the ISO to auto but I want you to keep track of it so we can see how it changes based on the aperture.
Depth of Field Activity (Google Doc)
Video Review:
Here is a quick video demonstration that covers how to adjust your settings on the Canon T2i.
Manual White Balance: Color temperature is a critical setting and this quick tutorial covers it well.
Learning Objectives: I will understand...
the difference in the angle of view created by a variety of lenses with different focal lengths
the technical elements that go into creating images with a shallow depth of field with a variety of lenses
the process of manual focusing a DSLR camera
Follow Focus
Getting sharp focus when shooting HD is critical and can be a real challenge with a DSLR camera especially when you have it set to shoot with a narrow depth of field. When your subject is moving closer or farther away you will need to adjust the focus during the shot. This is called “Pulling focus” and will be much easier if you have a “follow focus” device.
Recommendation: FocusShifter $50 - Simple and effective. I am going to buy one for every DSLR Kit I have!
Recommendation: FocusShifter $50 - Simple and effective. I am going to buy one for every DSLR Kit I have!
Standard Kit Lens
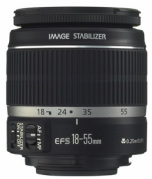
The Canon T2i usually comes with a standard 18-55mm kit lens. This is a very light weight lens that is great for running and gunning. In other words, its focal range will fit most of your shooting situations. The challenge
with this lens is that it has an f-stop of 3.5 at the 18mm end and 5.6 at the telephoto end of its focal range so it makes it more challenging to get that narrow depth of field and it is a challenge to get enough light in some
situations.
with this lens is that it has an f-stop of 3.5 at the 18mm end and 5.6 at the telephoto end of its focal range so it makes it more challenging to get that narrow depth of field and it is a challenge to get enough light in some
situations.
Prime Lenses vs Zoom Lenses
Prime lenses come in one focal length so you can usually get a faster lens (lower f-stop) with better optics for a cheaper price. Since they only have one focal length they also require more planning and setup when you are out in the field because controlling the framing of your shot is done by camera placement, not simply twisting the zoom ring.
My students love the images they can get with our prime lenses but they also want that all-purpose kit lens in their bag for when they need to frame up a shot quickly.
For more information read the DSLR Cinematography Guide or this article:
Prime vs Zoom Lenses – Which are Best?
My students love the images they can get with our prime lenses but they also want that all-purpose kit lens in their bag for when they need to frame up a shot quickly.
For more information read the DSLR Cinematography Guide or this article:
Prime vs Zoom Lenses – Which are Best?
Viewfinder
When you shoot video with a DSLR camera you are forced to use the LCD screen on
the back of the camera. This can be a major issue if you are shooting outside,
especially in bright sunlight. Some type of eye piece viewfinder is essential.
We purchased the Zacuto Z-Finder Pro and love the high quality construction but
at $400 it is not cheap!
Recommendation: Zacuto Z-Finder Pro 3 ~$00
Hoodman Loops (much cheaper alternatives)
Shoulder Rig
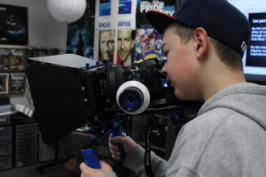
Shoulder Rigs are essential for keeping the DSLR cameras steady when shooting handheld. Many of today’s Television dramas and films use this technique to create a more gritty, documentary feel.
Recommendation: Flashpoint All-Inclusive DSLR/DV Cinema Bundle ~$500
Hand-On Overview: Adorama Photography TV
Recommendation: Flashpoint All-Inclusive DSLR/DV Cinema Bundle ~$500
Hand-On Overview: Adorama Photography TV
DIY: Do it Yourself
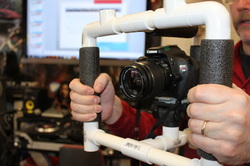
There are tons of ways to save money by building your own camera rigs. Check out just some of these.
Diy DSLR Shoulder Rig
Do-It-Yourself Dolly and Shoulder Rig
DIY Car Mounts for Small Camcorders
Cheap follow focus DIY
DIY Steadicam - Flying Camera Support
DIY Gyro-Stabilized Camera Rig
DIY Spider Trax Dolly Track
DIY - Rig Handles
How to make a DSLR Stabilizer
How to build a DSLR Cage
How to build a DSLR Cage - part II
DIY Camera Slider Dolly (the sequel)
CAMERA SLIDER DIY TUTORIAL
DIY Filming Dolly With 10' Track
Making Remyyy's Shoebox
DIY Camera Stabilizer - BodyPod
[/URL]$15.00 DIY Body DSLR Camera Stabilizer Sample

Joe Dockery | [email protected] | 425-831-8126
Mount Si High School | CTE Digital Media Teacher
Mount Si High School | CTE Digital Media Teacher